Final Project
Brief: To create a off screen interaction (Sensory engagement and the Haptic)
Projection mapping is the projection of a three or two dimensional scene onto a flat or 3d surface like a floor or a car respectively. The term mapping requires carefully mapping the surface to create projection without causing any distortion.
The first step in any projection mapping work/artwork is to provide/create a B&W map/mask of the surface to be projected upon. The map which then can be fed into a computer program that works with a projector to adjust the image/animation size,distortion and create a smooth, uniform or illusion projection.
Resolume Avenue is a real-time instrument for live/loop based audiovisual performances. It enables you to play video, audio and audiovisual clips, mix them with each other, apply effects to them and output the results either for a live performance or for recording.
Modul8 originally been designed for VJs and live performers. The concept remain is similar to Resolume Avenue
however only works with Mac OS X.
VPT 7 (VideoProjectionTool) is a free multipurpose realtime projection software tool for Mac and Windows created by HC Gilje.
Although it's a free software the user interface isn't as user friendly as Resolume Avenue.
Among other things it can be used for projecting video on complex forms, adapt a projection to a particular space/surface, combine recorded and live footage, for multiscreen HD playback.
Before proceeding with the theory I researched mapping software that is simple and quick to learn to learn.
Fig 1
Fig 2
Fig 3
Fig 4
Fig 5
The first step after connecting the projector to a computer is to project Photoshop as a second screen on the surface (see Fig 4). The idea is to get/draw the appropriate measurement in this case I used brush tool and created layer upon layer (see Fig 3).
Technical notes : Starting with the colums (see Fig 1), it is important to the place video/animation file in the first colum and the mask to the first layer because there will be multiple video file that needed to be placed in the various colums and layer and hence the time lapes continues.
Fig 1
Fig 2
Fig 3
In Fig 2 the mask is displayed in the layer effect propertise, also with a individual mask propertise which can be adjusted with the projection output on the 3d/2d model.
Since I only used Resolume Avenue to project the mask I won't be utilizing any of its other features.
This was just to show/practice the theory the original/main concept would be to include a piano mask
(Fig 4)
Fig 4
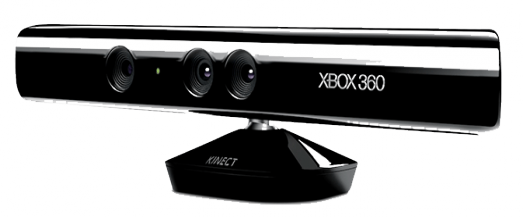
Kinect is a "controller-free gaming and entertainment experience" by Microsoft for the Xbox 360. It enables users to interact with the Xbox 360 (gaming console) without the need of a traditional controller through a natural user interface using gestures and voice commands.
The Kinect system identifies individual players through face recognition and voice recognition. A depth camera, which “sees” in 3-D, creates a skeleton image of a player and a motion sensor detects their movements. Speech recognition software allows the system to understand spoken commands and gesture recognition enables the tracking of player movements.
Although Kinect was developed for playing games, the technology has been applied to real-world applications as diverse as digital signage, virtual shopping, education, telehealth service delivery and other areas of health IT.
For myself I will be using it for movement detection and tracking.


Python is a programming language (more specifically a terminal programing language) that lets you work more quickly and integrate your systems more effectively.
Although it's more integrated into system the process of running it is quite difficult.
Processing is somewhat similar to Python is a programming language, development environment that's more hardware integrated.
Utilizing everything from voice recognition sensor to movement sensors.
Arduino, a single board computer was designed to make electronics more accessible to multimedia artist whether it is display performance, or human interaction.
The workshop was a basic introduction to the computer as well as its programming language.
The computer board varies from the performance to specific requirement.
Kinect Studio developed by Microsoft for developers to engaged, develop, interact and explore the possibilities of the Kinect Sensor.
Kinect for Windows also developed by Microsoft to give developers the ability to explore more in depth about Kinect.
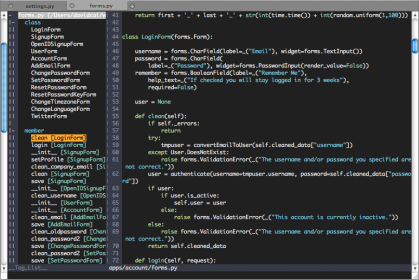
Experimenting with Python Programming.
After searching the internet I found a open source code for piano interaction. However it requires a lot of advanced programming skills.
This is the link to the source code:
https://github.com/petermoz/keyboard-anywhere
The Code requires me to install Ubuntu a open source operating system. So instead of installing a it as new OS in my machine I used VirtualBox. Virtual Box enables you to install a new operating system within the existing OS.
I have also experiment with processing and Kinect for windows but the outcome couldn't be finished.
SAMPLE_STRIDE = 2 # Divide depth map resolution by this amount
# Precompute U, V coordinates (since they never change)
U, V = np.meshgrid(np.arange(0,640, SAMPLE_STRIDE),
np.arange(0,480, SAMPLE_STRIDE))
def depth_to_xyz(u, v, stride, depth):
""" Convert depth map to cartesian coordinates.
Parameters as originally determined by Zephod (? I think). Or found on
the OpenKinect.org mailing list
"""
depth_flipped = depth[::-stride, ::stride]
valid = depth_flipped != 2047 # Non-return = 2047
us = u[valid].flatten()
vs = v[valid].flatten()
ds = depth_flipped[valid]
KinectMinDistance = -10
KinectDepthScaleFactor = .0021
zz = 100.0 / (-0.00307 * ds + 3.33)
xx = (us - 320) * (zz + KinectMinDistance) * KinectDepthScaleFactor
yy = (vs - 240) * (zz + KinectMinDistance) * KinectDepthScaleFactor
zz = -(zz - 200) # Move sensor from origin (easier for displaying)
points = np.vstack((xx,yy,zz)).astype(float)
return points
class Viewer(PyQGLViewer.QGLViewer):
""" Subclass PyQGLViewer to provide additional functionality. """
def __init__(self):
PyQGLViewer.QGLViewer.__init__(self)
self.points = np.zeros((3,1))
def init(self):
""" For initialisation once OpenGL context is created. """
self.setAnimationPeriod(33)
ogl.glDisable(ogl.GL_LIGHTING)
ogl.glEnableClientState(ogl.GL_VERTEX_ARRAY)
ogl.glEnable(ogl.GL_BLEND)
ogl.glBlendFunc(ogl.GL_SRC_ALPHA, ogl.GL_ONE_MINUS_SRC_ALPHA)
ogl.glEnable(ogl.GL_CULL_FACE)
ogl.glPointSize(2.0)
self.setStateFileName('display_kinect.xml')
if not self.restoreStateFromFile():
self.camera().setSceneRadius(500)
def animate(self):
""" Get the latest data from the kinect, and update the state. """
depth, timestamp = freenect.sync_get_depth()
xyz = depth_to_xyz(U, V, SAMPLE_STRIDE, np.array(depth))
self.points = xyz
def draw(self):
""" Draw the point cloud and keyboard. """
ogl.glColor4f(0.6,0.6,0.6,1)
ogl.glVertexPointer(3, ogl.GL_FLOAT, 0, self.points.T)
ogl.glDrawArrays(ogl.GL_POINTS, 0, self.points.shape[1])
def helpString(self):
""" Text shown in help window. """
output = "
display-kinect
"
output += "
Press ENTER to start/stop live display of Kinect Data.
"
return output
if __name__ == '__main__':
app = QtGui.QApplication([])
win = Viewer()
win.show()
app.exec_()
This is the code for Python to enable interaction with Kinect. However it requires a lot of dependencies.